Table of Contents
- Why Drywall Repair Is the Make-or-Break Step in Residential Renovations
- Drywall Repair Tools List: What You Actually Need
- Assessing Damage: Small Holes, Nail Pops, and Large Openings
- Fixing Water Damaged Drywall Before It Spreads
- Drywall Texture Matching Techniques for a Seamless Finish
- Applying Joint Compound, Sanding, and Priming for a Paint-Ready Wall
- DIY vs. Pro: Cost-Benefit Analysis for Residential Renovations
- Frequently Asked Questions
Last Updated: September 14, 2026
Why Drywall Repair Is the Make-or-Break Step in Residential Renovations
Drywall repair is the process of restoring damaged wallboard, from hairline cracks to full-section replacement, so the finished surface accepts paint and texture without visible seams. In residential renovations, this step decides whether the room looks finished or patched, a rushed patch telegraphs itself every time light hits the wall at an angle.
The stakes are higher than most homeowners expect. Walls and ceilings absorb moisture from plumbing leaks and roof failures long before a stain becomes visible, which is why the EPA’s mold guidance for homeowners treats fast drying as the first line of defense. Sand and finish poorly and you get a lumpy wall under paint. Match texture badly and the repair reads as a scar. Get it right and nobody ever knows the damage existed.
Below, we walk through the tools worth owning, how to assess damage type, the repair methods for each, and where DIY stops making sense.
Drywall Repair Tools List: What You Actually Need
The drywall repair tools list is shorter than most hardware store aisles suggest, but for a renovation, where you may be patching dozens of spots across multiple rooms, the difference between a $40 setup and a $400 setup is dust, not blades. Buy for containment first, finishing second.
Essential Hand Tools and Materials
Start with these:
- Taping knife and putty knife in 4-inch, 6-inch, and 10-inch widths. The 10-inch is the one that hides seams; the 4-inch is the one that creates them.
- Drywall saw for cutting openings you can actually patch
- Utility knife with fresh blades, changed often, a dull blade tears the paper face and creates a fuzzy edge that shows under paint
- Drywall screws (1-1/4 inch for 1/2-inch board, 1-5/8 inch for 5/8-inch board) and a driver with a dimpler bit
- Mesh tape or paper tape for seams and patches. Paper tape is stronger on flat seams; mesh is faster on irregular patches.
- Joint compound in a lightweight all-purpose formula for taping, plus a setting-type compound (like a 20- or 45-minute mix) for fill coats
- Sanding block plus 120- and 220-grit sandpaper, or a pole sander for ceilings
- Primer and patching compound for spot work
A stud finder helps locate framing behind a large opening, and a backing board, typically a strip of 1×3 plywood or scrap wallboard, anchors patches that span more than a few inches. Keep a scrap pile of the same thickness board you’re repairing; matching 1/2-inch to 5/8-inch matters because the patch will sit proud or recessed otherwise.
Dust Containment and Surface Preparation
Drywall dust is the single biggest reason homeowners regret a DIY repair. The fine gypsum particles pass through standard shop vac filters and settle on every horizontal surface in the house, including inside HVAC ducts, where they recirculate for weeks (the EPA).
The fix is a containment system, not a bigger broom:
- HEPA-filtered vacuum rated for drywall dust (not a standard shop vac), with a filter rated at 99.97% at 0.3 microns
- Zip-wall or plastic sheeting with a zippered door, taped floor-to-ceiling at the work zone boundary
- Negative air machine or box fan pulling air out a window, so dust moves away from the rest of the house
- Tape off HVAC registers with plastic and painter’s tape before you cut anything
- Drop cloths, not thin plastic, under the work zone, canvas grips dust, plastic lets it slide
For a single patch, a HEPA vac and a taped doorway are enough. For a renovation with multiple repair zones, set up containment once and move it room to room.
Wipe the repair area with a damp cloth before applying compound, dust and loose paper keep joint compound from bonding, and a patch that fails to bond will crack within months. Where old paint or wallpaper adhesive is present, sand first; compound will not adhere to a glossy or contaminated substrate.
If you are repairing more than two or three spots in a renovation, rent a HEPA dust extractor with a sander attachment. It costs less than a day of cleanup and captures dust at the source instead of after it settles.
Assessing Damage: Small Holes, Nail Pops, and Large Openings
Damage type determines your method, and misreading it wastes time.
Patching Small Holes and Nail Pops
Holes under about 2 inches take patching compound directly. Clean the edges, apply compound, let it dry, and sand flush.
Nail pops are different. A pop means the fastener has broken through the surface, usually from framing movement. Drive a new drywall screw an inch or two from the popped nail, dimple it just below the surface, scrape away loose paper, and cover with two thin coats of joint compound, feathering edges outward.
Never just spackle over a nail pop. The fastener will push through again within a season. Reset the board with a new screw first, every time.
Repairing Large Holes with Backing Board
Openings larger than 6 inches need backing. Cut the damaged section into a clean rectangle using your drywall saw. Slip a backing board behind the opening and screw it to the existing wallboard edges. Cut a patch from matching wallboard, screw it to the backing, then tape the seams with mesh tape.
Apply three coats of joint compound, fill, build, and a thin finish coat, sanding lightly between each. Feathering edges roughly 10 inches beyond the seam hides the repair under paint.
Fixing Water Damaged Drywall Before It Spreads
Fixing water damaged drywall starts with finding the source, not the stain. Repairing the surface while the leak continues guarantees the damage returns.
Moisture and Mold Remediation
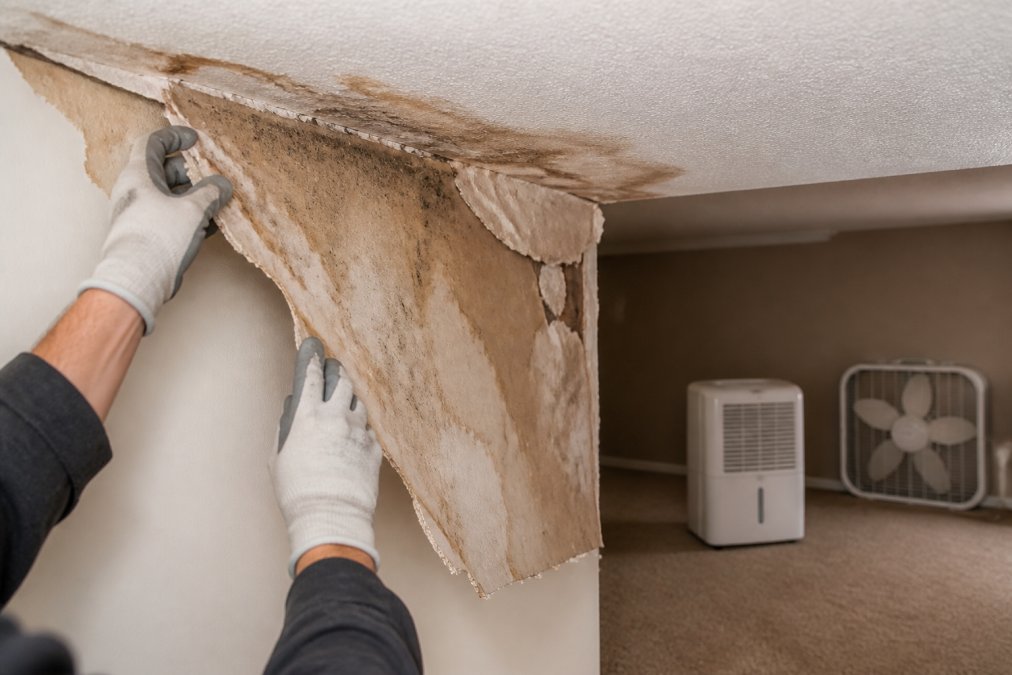
Wallboard that crumbles, feels soft, or shows dark discoloration is compromised and must come out. Cut back to dry, sound material and dispose of the removed section. According to the CDC’s guidance on mold cleanup, porous materials with mold growth generally cannot be cleaned and should be removed.
Dry the cavity thoroughly with fans and a dehumidifier before closing it up. If the affected area is larger than roughly 10 square feet, or if you smell persistent mustiness after drying, bring in a professional. Moisture-resistant board, often called greenboard, belongs in bathrooms and laundry areas.
Painting over a water stain without sealing it first lets the stain bleed through the new finish within weeks. Prime with a stain-blocking primer before any paint goes on.
Drywall Texture Matching Techniques for a Seamless Finish
Texture matching is the step that separates an invisible repair from an obvious one. The goal is to replicate the existing wall texture, not improve it.
Matching Orange Peel, Knockdown, and Skip Trowel
Orange peel has a fine, stippled surface, sprayed or rolled on with thinned joint compound. Knockdown is applied heavier, then flattened with a trowel while still wet, leaving irregular smooth patches. Skip trowel is the most random, applied by hand in overlapping arcs.
Practice on a scrap of wallboard first. Test your mix, let it dry, and compare it side by side with the existing texture under the room’s actual lighting, adjusting compound consistency and tool pressure until the sample matches.
Texture matching fails most often because the compound is mixed too thick. Thinner mix, lighter touch, and a test patch on scrap board will save you a repaint.
Applying Joint Compound, Sanding, and Priming for a Paint-Ready Wall
Applying joint compound is a layering process, not a single heavy coat. Each coat goes on thinner than the last and dries fully before the next. In a renovation, scheduling matters here, you cannot paint, trim, or lay flooring until the compound is fully cured, and rushing dry time is the most common cause of a patch that fails six months later.
Why Compound Shrinks, and Why That Changes Your Coats
Joint compound is roughly 50% water by weight when mixed. As that water evaporates, the compound shrinks, pulling the patch surface slightly below the surrounding wall. This is why a single thick coat always fails: it shrinks more, cracks at the edges, and leaves a visible depression under raking light.
The fix is thin coats, built up. A setting-type compound (mixed from powder with a 20-, 45-, or 90-minute working time) shrinks less than pre-mixed all-purpose because it cures chemically rather than by drying. Many finishers use setting compound for the fill coat and all-purpose for the finish, gaining both strength and a smooth sandable surface.
The Coat Sequence
Here’s the sequence that produces a flat, paint-ready surface:
| Stage | What You Do | Dry Time | Sanding Grit |
|---|---|---|---|
| Fill coat | Press compound into tape and seams; embed the tape fully | 24 hours (or per setting-compound label) | 120 |
| Build coat | Widen the repair, feather edges 10 inches beyond the seam | 24 hours | 120 |
| Finish coat | Thin skim coat over the whole patch, thinned with water | 24 hours | 220 |
| Prime | Seal the compound before paint | Per label | None |
Sand lightly between coats, and don’t over-sand, cutting through the paper face creates a fuzzy surface that shows under paint. A pole sander with a foam backing pad is faster and less likely to gouge than a hand block on large patches.
Sanding Without Filling the House With Dust
Sanding is where the containment setup from the tools section earns its cost. A few rules that matter in a renovation:
- Sand wet or damp when possible. A damp sponge knocks down ridges without airborne dust, slower, but it eliminates the cleanup.
- Use a HEPA vacuum attachment on a pole sander if you dry-sand, so dust goes into the vac, not the air.
- Do not over-sand the edges. Feathering means blending compound into the wall, not sanding the wall itself. Once you see the paper face, stop.
- Wipe with a damp cloth before priming, or dust gets trapped under primer and shows as a rough patch.
Priming: The Step That Prevents Flashing
Primer seals the porous compound so it absorbs paint at the same rate as the surrounding wall, preventing the patch from flashing, drying to a slightly different sheen or color than the rest of the wall. On a full-room repaint this matters less; on a spot repair in an existing painted room, it is the difference between invisible and obvious.
Use a stain-blocking primer if the repair involved water damage, smoke, or a marker stain; use a standard drywall primer for clean patches. Let the primer dry fully before topcoat, most labels specify two to four hours, but humidity can double that.
In a renovation, schedule drywall finishing before trim and flooring, not after. Compound dust settles into every gap, and a finished floor is far harder to protect than an unfinished subfloor.
DIY vs. Pro: Cost-Benefit Analysis for Residential Renovations
DIY makes sense for small patches, texture touch-ups, and single nail pops. It stops making sense the moment water, mold, or a large opening enters the picture.
The real cost of DIY isn’t materials, it’s rework. A badly feathered seam or mismatched texture means sanding down and starting over, and most homeowners discover the problem only after priming. In a renovation with walls and ceilings already exposed, one botched patch can delay paint, trim, and flooring across the whole room.
Professional repair changes the math in three ways: damage gets assessed correctly, so hidden moisture or a failed fastener is caught before it returns; texture matching is done by someone who has matched orange peel and knockdown hundreds of times; and the work carries a guarantee, which matters when you’re selling the home or finishing a rental.
At The Patch Wiz, we handle water and flood damage restoration, ceiling repair, and texture matching for homeowners and businesses across Levy County. Our team works from a 100% project success rate across 500+ completed projects, with customized solutions for every repair.
Frequently Asked Questions
How do you repair drywall for a professional finish during renovations?
A professional finish starts with proper surface preparation, using mesh or paper tape on seams, and applying multiple thin coats of joint compound rather than one thick layer. Feathering edges 6 to 8 inches beyond the patch prevents visible ridges. After sanding with 120 to 220 grit, apply a primer before painting. Texture matching is the final step that makes the repair disappear. For renovations where walls will be painted a flat sheen, small imperfections hide better than on glossy finishes.
Is it better to patch drywall or replace the entire sheet?
Patching works well for holes under 12 inches and isolated damage like nail pops or small water stains. Replace the full sheet when damage spans more than a third of the panel, when the paper facing is delaminated across a large area, or when moisture has compromised the gypsum core. In residential renovations, partial replacement is common near tubs, sinks, and windows where water damage concentrates. A contractor can assess whether a patch will hold up under new paint and texture.
What tools are essential for residential drywall repair?
A drywall repair tools list should include a 6-inch and 10-inch taping knife, a putty knife, mesh tape, paper tape, joint compound, a sanding block, 120 and 220 grit sandpaper, a drywall saw, a stud finder, and drywall screws. For larger repairs, add a backing board and corner bead. Dust containment plastic and a vacuum attachment help control mess. A patch kit handles small holes without mixing compound. Quality tools make texture matching and feathering edges far easier.
How long does drywall repair take to dry before painting?
Joint compound drying time depends on coat thickness, humidity, and airflow. A thin coat of lightweight compound dries in 4 to 6 hours under good conditions. Thick patches or humid rooms can take 24 hours or more. Always let each coat dry completely before sanding or adding the next. Primer must cure fully before paint. Rushing the process traps moisture and causes cracks or bubbles later. In water-damaged areas, confirm the substrate is dry before closing up the wall.
Water damage never stays where you found it, and a repair that looks fine today can fail the moment humidity returns. If you’re planning a renovation or staring at a ceiling stain you’d rather not think about, get a free consultation from The Patch Wiz. We assess the damage, restore the surface, and match your existing texture so the finished wall looks like nothing ever happened.