
Table of Contents
- How to Fix Water Damaged Drywall: Step-by-Step
- Assess the Damage and Plan Your Repair
- Signs of Mold Behind Drywall
- Tools Needed for Drywall Repair
- How Long Does Drywall Take to Dry?
- Removing Damaged Material and Repairing the Wall
- Priming and Finishing Water-Stained Drywall
- When to Call a Professional for Water Damage Restoration
- Frequently Asked Questions
Last Updated: September 13, 2026
How to Fix Water Damaged Drywall: Step-by-Step
Water damaged drywall is a race against time. The longer moisture sits inside the paper facing and gypsum core, the more likely you are to trade a simple patch job for mold remediation and structural repairs. Homeowners who act within the first 48 hours often spend far less than those who wait a week (the EPA). This guide walks you through how to fix water damaged drywall the way a professional would.
The single biggest mistake we see is painting over a stain and calling it done. That trap costs homeowners dearly, because EPA guidance on mold cleanup and moisture control makes clear that mold needs only lingering dampness to take hold behind the surface. Below, we’ll show you exactly how to find the true source, dry the cavity, and finish the repair so it disappears into the wall.
Assess the Damage and Plan Your Repair
Assessment is the step most DIY guides rush, and it’s where repairs fail. Before you cut anything, find the water source and confirm it’s stopped. A repaired wall over an active leak is a guaranteed callback.
Here’s how to size up the job:
- Trace the source. Water travels along studs and joists, so the stain on your ceiling may originate several feet away. Follow the path uphill to the entry point, a roof leak, supply line, drain, or window flashing failure.
- Check for softness. Press the drywall gently. Spongy or crumbling areas need removal, not patching.
- Measure moisture content. A moisture meter tells you whether the cavity is dry enough to close up. Readings above roughly 15% on the meter mean keep drying.
- Photograph everything. Document the stain, the source, and the extent before you touch a tool. This matters for insurance.
Never assume a dry surface means a dry wall. Drywall paper can feel normal while the gypsum core and insulation behind it stay damp for days, feeding mold you can’t see.
Structural Integrity: What to Check Before You Patch
Most guides stop at the cosmetic layer. That’s a mistake: water can compromise the framing the drywall is screwed to, and a patch over a soft stud is a patch over a future failure.
Once you’ve opened the cavity, inspect the framing directly:
- Probe the studs and joists. Push a screwdriver into the wood at the stain line and a few inches above and below it. Sound wood resists; punky wood crumbles. Soft framing gets replaced or sistered, not patched over.
- Look for rot and staining. Dark, crumbly wood with a musty smell is decay; white or gray cottony growth is mold. Either means the framing is in the repair scope, not just the panel.
- Check for sag or bow. Hold a straightedge against the stud or joist. A visible bow means the member has lost stiffness and may need structural repair, not cosmetic.
- Check the ceiling above. A bowed ceiling often points to a joist or subfloor issue above. If the sag is more than a slight dip, get a professional assessment before loading it with new drywall.
- Confirm the load path. If you’re removing a section of wall that turns out to be load-bearing, you need a temporary support plan before you cut. When in doubt, treat it as load-bearing.
If any of these checks fail, the job has moved from “drywall repair” to “structural repair.” That’s the line where a professional assessment is worth the cost.
Documenting the Damage for an Insurance Claim
If the water came from a covered event, a burst pipe, storm, or appliance failure, your repair budget may depend on how well you document the damage. Do this before you clean up or throw anything away.
A practical documentation checklist:
- Photograph the source and the path. Wide shots of the room, mid shots of the stain, close-ups of the source. Include a ruler or coin in one close-up for scale.
- Photograph the moisture meter readings with the date visible.
- Keep the damaged materials. Don’t haul wet drywall and insulation to the curb until the adjuster has seen it or told you to discard it. Bag and label a sample if you must remove it.
- Save receipts for fans, dehumidifiers, and any emergency mitigation you paid for out of pocket.
- Write a timeline. When you noticed the damage, found the source, stopped it, and started drying. A short dated log carries more weight than a memory.
- Get the repair scope in writing if you hire a pro, and keep the final invoice with your claim file.
Homeowners often document the visible stain but not the source or moisture readings, then get pushback on whether the damage was pre-existing. The photos and meter log settle that question.
Assess in this order: stop the source, measure moisture, inspect the framing, document everything. Skipping the framing check or the documentation is how a small repair turns into a denied claim or a second repair.
Signs of Mold Behind Drywall
Mold behind drywall announces itself in a few recognizable ways, and catching it early keeps a patch job from becoming a full remediation. Common signs: a musty, earthy odor that won’t clear, dark speckling spreading beyond the original stain, and bubbling or peeling paint.
If you notice any of these, treat the area as contaminated. Small surface mildew on the paper facing can often be cleaned, but mold that has penetrated the gypsum core or the insulation means that section of drywall comes out. Wear a respirator and safety goggles before you disturb it, and isolate the room with plastic sheeting to keep spores from spreading. When in doubt, CDC information on mold and your health recommends removing and discarding porous materials that have been wet for more than a couple of days rather than trying to salvage them.
Tools Needed for Drywall Repair
The right tools turn a messy repair into a clean one. Most are affordable, and a few (a moisture meter, a good taping knife) are worth buying rather than borrowing.
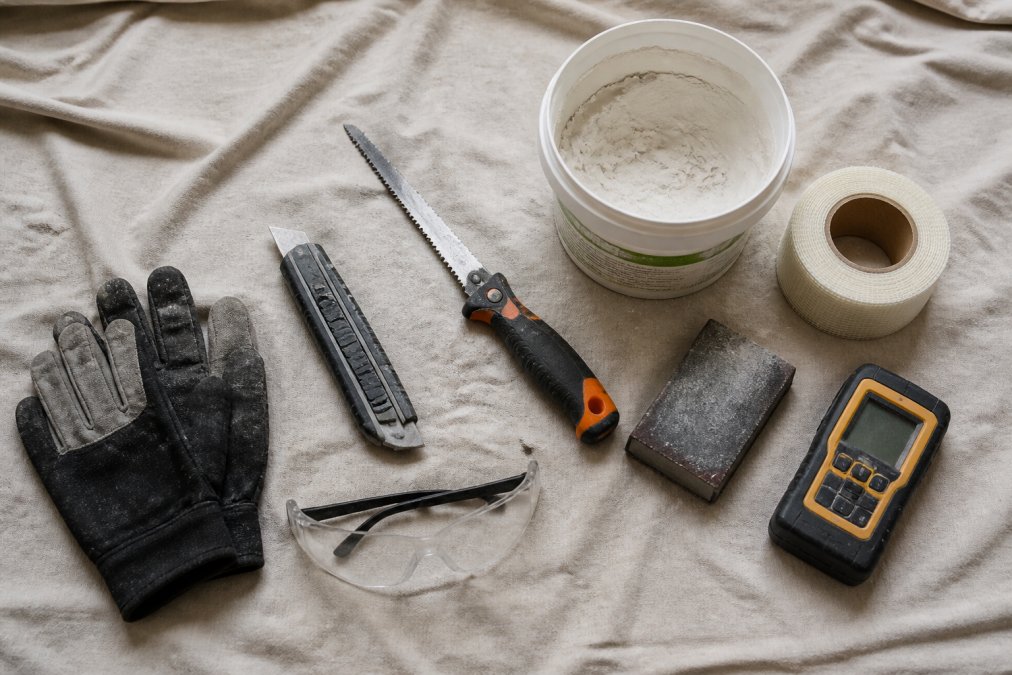
Here’s the working kit:
- Moisture meter to confirm the wall is dry before closing it
- Utility knife and drywall saw for clean cuts around the damaged section
- Drywall screws to re-secure loose board to the studs
- Joint compound and drywall tape for taping and finishing seams
- Sanding block with fine-grit sandpaper for feathering edges smooth
- Respirator and safety goggles for dust and any mold disturbance
- Oil-based or shellac primer to seal water stains and stop tannin bleed
How Long Does Drywall Take to Dry?
Drywall takes 24 to 48 hours to dry in good conditions, but that stretches to several days when humidity is high or the cavity is enclosed. Drying time depends on airflow, temperature, and how much water got in, and the only way to know you’re done is to measure, not guess by touch.
Gypsum board is a paper-faced panel with a crystalline gypsum core. The paper facing wicks and dries fast, which is why a wall can feel dry while the core and insulation behind it stay damp for days. Mold needs only lingering dampness and a food source, the paper facing qualifies, so the surface feel test is the most common reason a repair fails and a stain reappears.
What to measure, and where
- Use a pin-type or pinless moisture meter on the drywall face, then on the exposed gypsum core and studs after you open the cavity.
- A common working target is under 15% moisture content on the meter before you close the wall. Many practitioners aim for under 12% on wood framing, since framing dries slower than the panel.
- Take readings at the same spots each time, the stain’s center, the edges, and 12 inches beyond the visible damage. A single reading can lie; a map won’t.
- Compare the damaged area against an unaffected wall in the same room. The dry reference wall is your baseline, not an absolute number.
How to speed drying
- Open the cavity if damage is significant. Sealed cavities dry at a fraction of the rate of an open one.
- Run a dehumidifier and fans continuously, and keep the room warm. Warm air holds more moisture; moving air carries it away.
- Direct airflow across the wet face and into the cavity, not just at the room. A fan pointed at a wall does less than a fan moving air through the opening.
- If a vapor barrier was part of the original wall assembly, make sure it goes back correctly, or trapped moisture will return.
Post-repair moisture monitoring
This is the step most guides skip, and it prevents a callback. After you close the wall, re-check the same spots at one week and one month. A slow leak you missed shows up as a rising reading, a fresh stain, or a soft spot long before visible mold. If the reading climbs, re-open the wall, you have an active moisture source, not a drying problem.
Photograph your moisture meter readings with the date visible. If you ever file an insurance claim or sell the home, a documented dry-down record is the difference between “we fixed it” and “we can prove it.”
If the wall still reads wet after a week of continuous airflow and dehumidification, the problem isn’t drying time, it’s an active leak or a sealed cavity. Find the source before you dry another day.
Removing Damaged Material and Repairing the Wall
Cutting out the damage is straightforward once the leak is fixed. Score a clean rectangle around the affected area with your utility knife, extending a couple of inches past the visible damage on all sides, then remove the drywall and any wet insulation behind it.
Next steps:
- Inspect the studs and joists for softness or rot. Sound wood goes back into service; punky wood gets replaced.
- Vacuum out debris and let the cavity dry fully.
- Cut a replacement piece of drywall to fit, slightly smaller than the opening.
- Secure it with drywall screws into the studs, keeping screws just below the surface.
- Add blocking or a backer strip if the patch spans a gap with no stud behind it.
Patching Holes and Applying Joint Compound
Patching is where craftsmanship shows. Apply a bed coat of joint compound over the seams, press drywall tape into it, and let it set. Build up thin coats, feathering each wider than the last, until the patch sits flush. Light sanding between coats keeps the surface flat.
Feather each coat 2-3 inches wider than the previous one. This gradual taper is what makes a patch invisible under paint, and it’s the step most DIY repairs skip.
Priming and Finishing Water-Stained Drywall
Priming is not optional on water damage, and the primer you choose matters. Standard latex paint lets the brown stain bleed through, no matter how many coats. You need a stain-blocking primer.
For water stains and tannin bleed, an oil-based or shellac-based primer is the reliable choice. These seal the stain and create a uniform surface for your topcoat. Apply a full coat over the repaired area, let it cure, then paint to match. If your ceiling has orange-peel or knockdown texture, match it before priming with spray texture or rolled thinned compound, then prime over it once dry. Texture matching is the difference between a repair you can spot across the room and one nobody notices.
When to Call a Professional for Water Damage Restoration
Some jobs are worth handing off, and knowing the line saves money and headaches. Call a professional when damage covers a large area, when water came from a flood or sewage backup, when mold has spread into the wall cavity, or when the ceiling is sagging.
Sagging drywall is a structural warning, not a cosmetic one. A bowed ceiling may mean compromised joists or a subfloor issue above, a job for someone who can assess structural integrity, not just patch a hole. Insurance claims are another reason to bring in a pro: thorough documentation of the damage, source, and repair supports your claim, and a professional repair record carries more weight than a DIY patch.
The three signs to stop and call a pro: sagging ceilings, mold spread beyond the surface, and any damage from a flood or sewage source. These aren’t patch jobs.
Frequently Asked Questions
Can water damaged drywall be saved, or does it always need replacing?
It depends on how wet it got and for how long. Drywall that soaked up water and started to sag, crumble, or grow mold usually needs to come out. If the damage is limited to a small area and the drywall is still firm, you can cut out the affected section, let the framing dry, and patch it. A moisture meter reading below 15% is a good sign the wall is dry enough to repair.
What does water damage behind drywall look like?
Look for yellow or brown water stains, bubbling or peeling paint, soft or spongy spots, and a musty smell. You may also see visible mold growth near baseboards or ceiling seams, or notice the wall feels cool and damp. A moisture meter can confirm hidden moisture. If the drywall crumbles when you press it, the damage has likely reached the paper backing and the panel needs replacing.
How long does drywall take to dry after a leak?
With fans and a dehumidifier running, most drywall dries in 24 to 48 hours. Thick or soaked sections can take 3 to 5 days. Humidity, airflow, and how much water got in all affect the timeline. Check with a moisture meter before you patch; if the reading stays above 15%, keep drying. Sealing wet drywall traps moisture and leads to mold.
Is it safe to leave water damaged drywall untreated?
No. Moist drywall supports mold growth within 24 to 48 hours, and mold can spread behind the wall where you cannot see it. The paper facing also loses strength when wet, so the panel can sag or crumble over time. If the leak came from a roof or pipe, the framing and insulation may also be wet. Fixing the source and drying the area quickly prevents bigger structural problems.
Water damage never waits, and neither should your repair. The longer a damp wall sits, the more it costs to fix. The Patch Wiz handles water and flood damage restoration, precise texture matching, and professional drywall installation across Levy County, with quick response, customized solutions for every repair, and a 100% project success rate backed by 500+ completed projects. Get a free consultation with The Patch Wiz and restore your walls and ceilings with a finish that lasts.